Managing customer data separately in Salesforce and QuickBooks can create delays, duplicate records, and unnecessary manual work for teams. Businesses often struggle to keep both systems updated when customer information changes frequently.
With a proper Salesforce to QuickBooks integration, teams can sync customer records directly from Salesforce to QuickBooks Online using the built-in Sync Button feature. This helps businesses maintain accurate customer data, reduce manual entry, and improve operational efficiency.
In this guide, we will walk through the complete process of configuring to transfer customer records from Salesforce to QuickBooks Online.
Prerequisites
Before starting the setup process, make sure the following requirements are completed:
- Your Salesforce org is connected to QuickBooks Online.
- Customer’s field mappings are correctly configured in the integration settings.
- You are on the paid version of the integration (Salesforce-to-QB data sync is a paid feature).
Step 1: Set Up Your QuickBooks Company
- Complete the integration between Salesforce and QuickBooks Online by following the official setup guide:
QuickBooks Company Setup Guide →
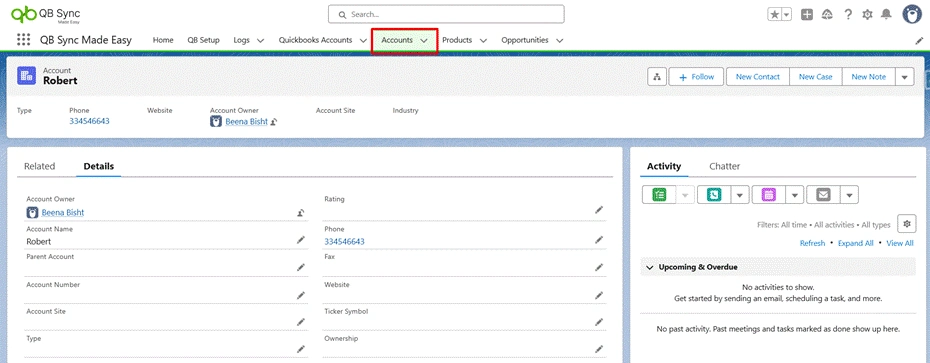
Step 2: Open the Salesforce Object (Account)
- Navigate to the Account.
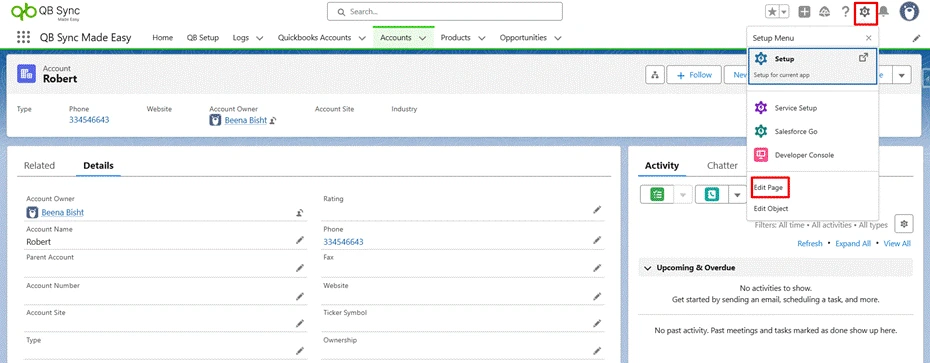
Step 3: Click the Gear Icon → Edit Page
- In the top-right corner of Salesforce, click the Gear Icon and select Edit Page to open the Lightning App Builder.
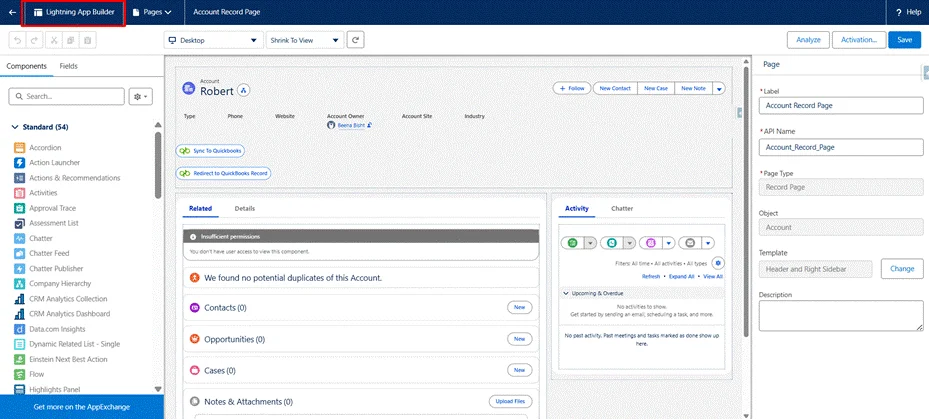
Step 4: Open the Lightning App Builder
- The Lightning page editor for the selected object will open, where you can add, arrange, and configure components on the page layout.
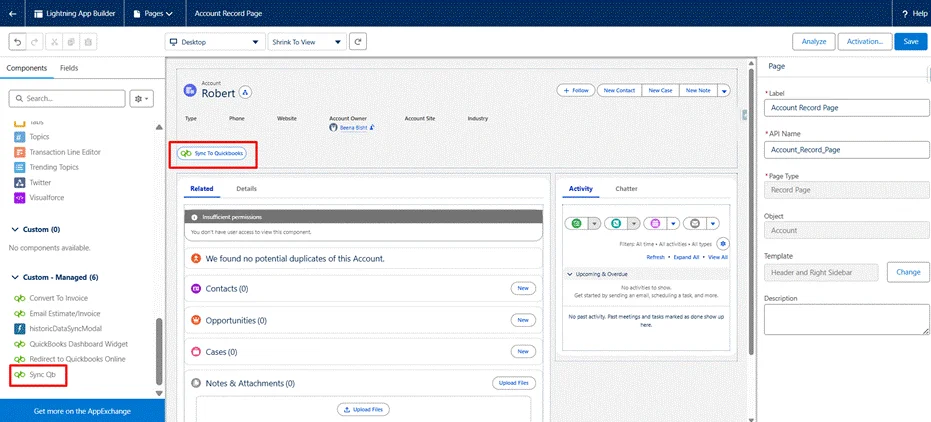
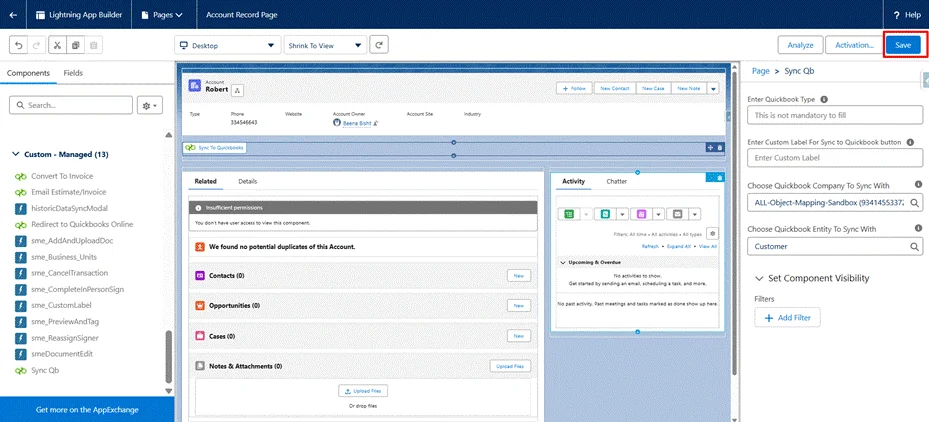
Step 5: Drag and Drop the Sync Button Component
- In the left-hand component panel, locate the Sync Button component. Drag and drop it into your preferred section of the page layout.
Step 6: Configure the Button
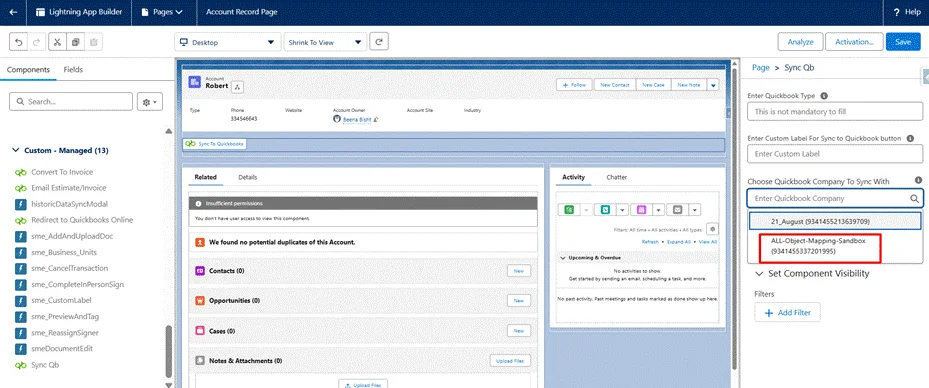
- Click on the Sync Button component to open its configuration panel on the right.
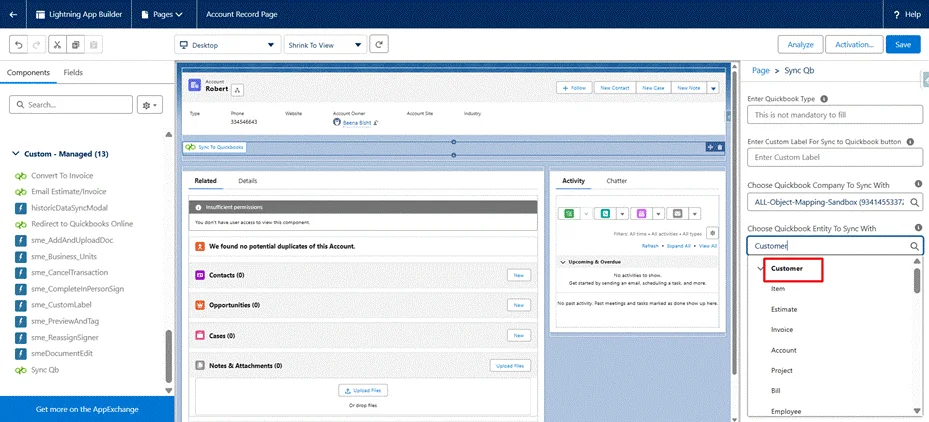
You will need to fill in two settings:
- The QuickBooks company to connect to:
- The QuickBooks object you want to sync (e.g., Customer):
Step 7: Save Your Changes
- Click Save in the top-right corner of the Lightning App Builder to apply your page layout changes.
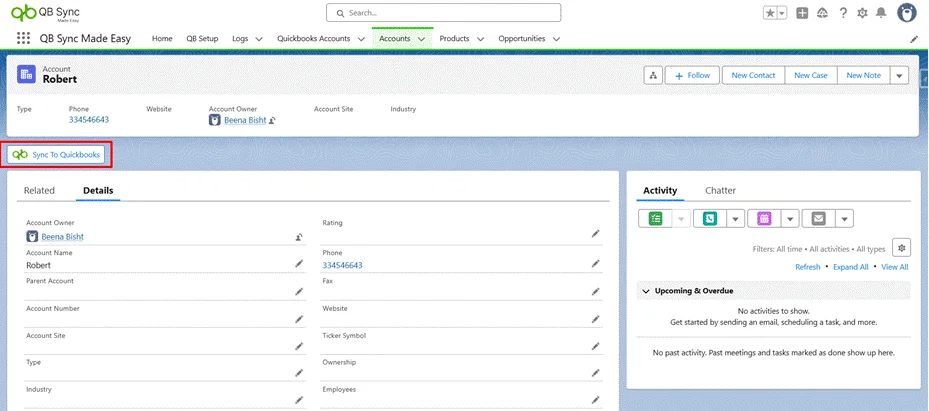
Step 8: Return to the Record and Sync
- Navigate back to a record on that object. After verifying all required fields are filled in, click the Sync Button to trigger the sync.
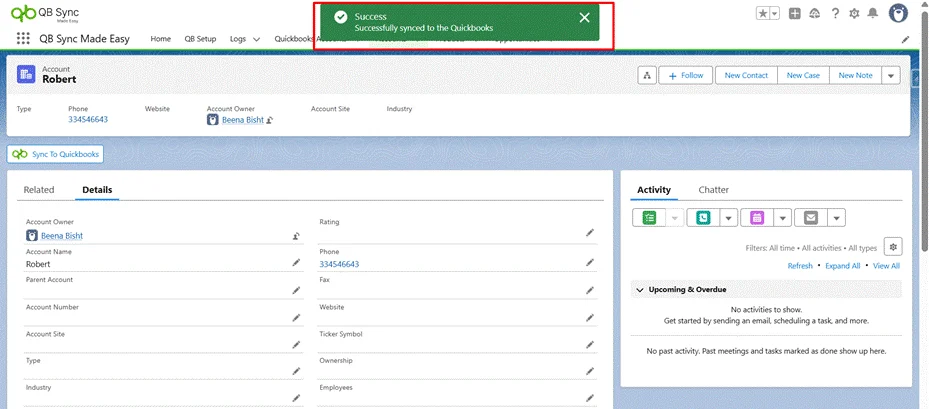
- Then, a confirmation message will appear indicating that the record has been successfully synced with QuickBooks Online.
Conclusion
Keeping customer records aligned between Salesforce and QuickBooks manually can become difficult as businesses grow.
With the Sync Button feature inside QB Sync Made Easy, businesses can simplify customer synchronization directly from Salesforce in just a few clicks. The setup process is straightforward and does not require complex development or technical configuration.
By following the steps above, Team can trigger customer syncs instantly, and maintain consistent records between Salesforce and QuickBooks Online.