
Managing records between QuickBooks and Salesforce manually can cause duplicates and inconsistencies. Salesforce automation, particularly with QB Sync Made Easy, streamlines record creation and synchronization, reducing manual effort and enhancing accounting workflows. This blog outlines the steps to automate QuickBooks record creation using the Create Flow Template, including prerequisites like installing the QB Sync Made Easy package and connecting QuickBooks to Salesforce. Key steps include setting up the flow trigger, configuring the flow action, and activating the flow to ensure seamless data transfer. Automating this process allows teams to focus on more strategic tasks rather than repetitive data entry.
Managing records across QuickBooks and Salesforce manually can lead to duplicate entries and inconsistent data. Salesforce automation helps businesses reduce repetitive tasks and keep records aligned across both platforms.
With QB Sync Made Easy, businesses can simplify record creation and improve how data moves between Salesforce and QuickBooks. This helps reduce manual effort and supports more consistent accounting workflows.
In this blog, we will walk through how to automate QuickBooks record creation using the Create Flow Template, from configuring the required settings to activating automatic synchronization.
Prerequisites
Before configuring the automation, ensure that:
✅ The QB Sync Made Easy package is installed.
✅ Your QuickBooks company is connected to Salesforce.
✅ The required Salesforce and QuickBooks object mapping is completed.
✅ The required fields between the Salesforce and QuickBooks objects are mapped.
✅ You have the necessary permissions to create and activate Salesforce Flows.
You can refer to the installation and company connection guide here:
Installation Guide –
Company Connection –
How to Set Up Automatic QuickBooks Record Creation in Salesforce
Salesforce automation helps businesses automatically create and synchronize records between Salesforce and QuickBooks, reducing manual data entry and keeping information consistent across both platforms. Follow the steps below to automate your QuickBooks Salesforce Integration.
Step 1: Navigate to Flow Setup
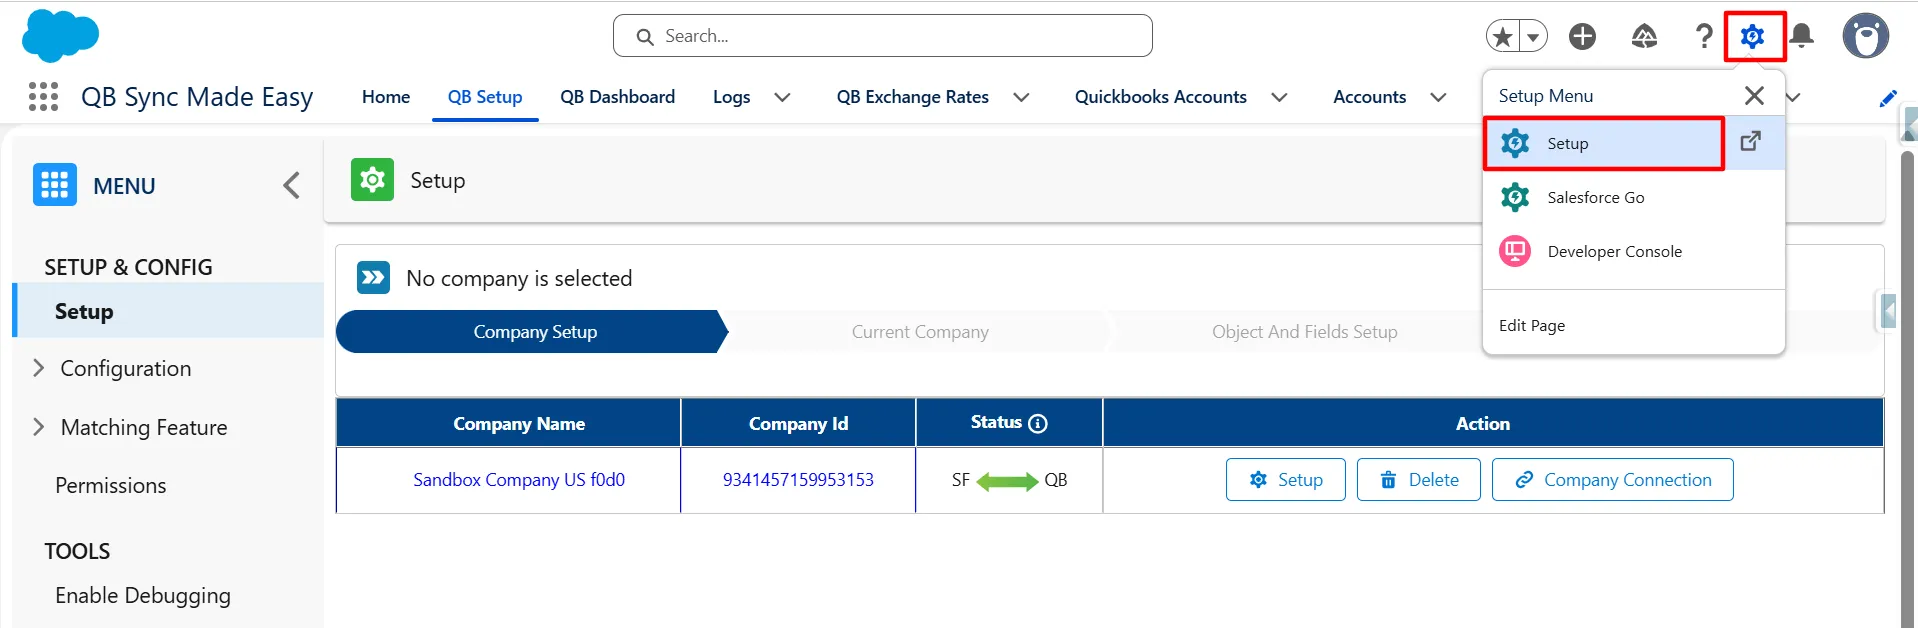
- Click the Gear icon (⚙️) in Salesforce.
- Select Setup.
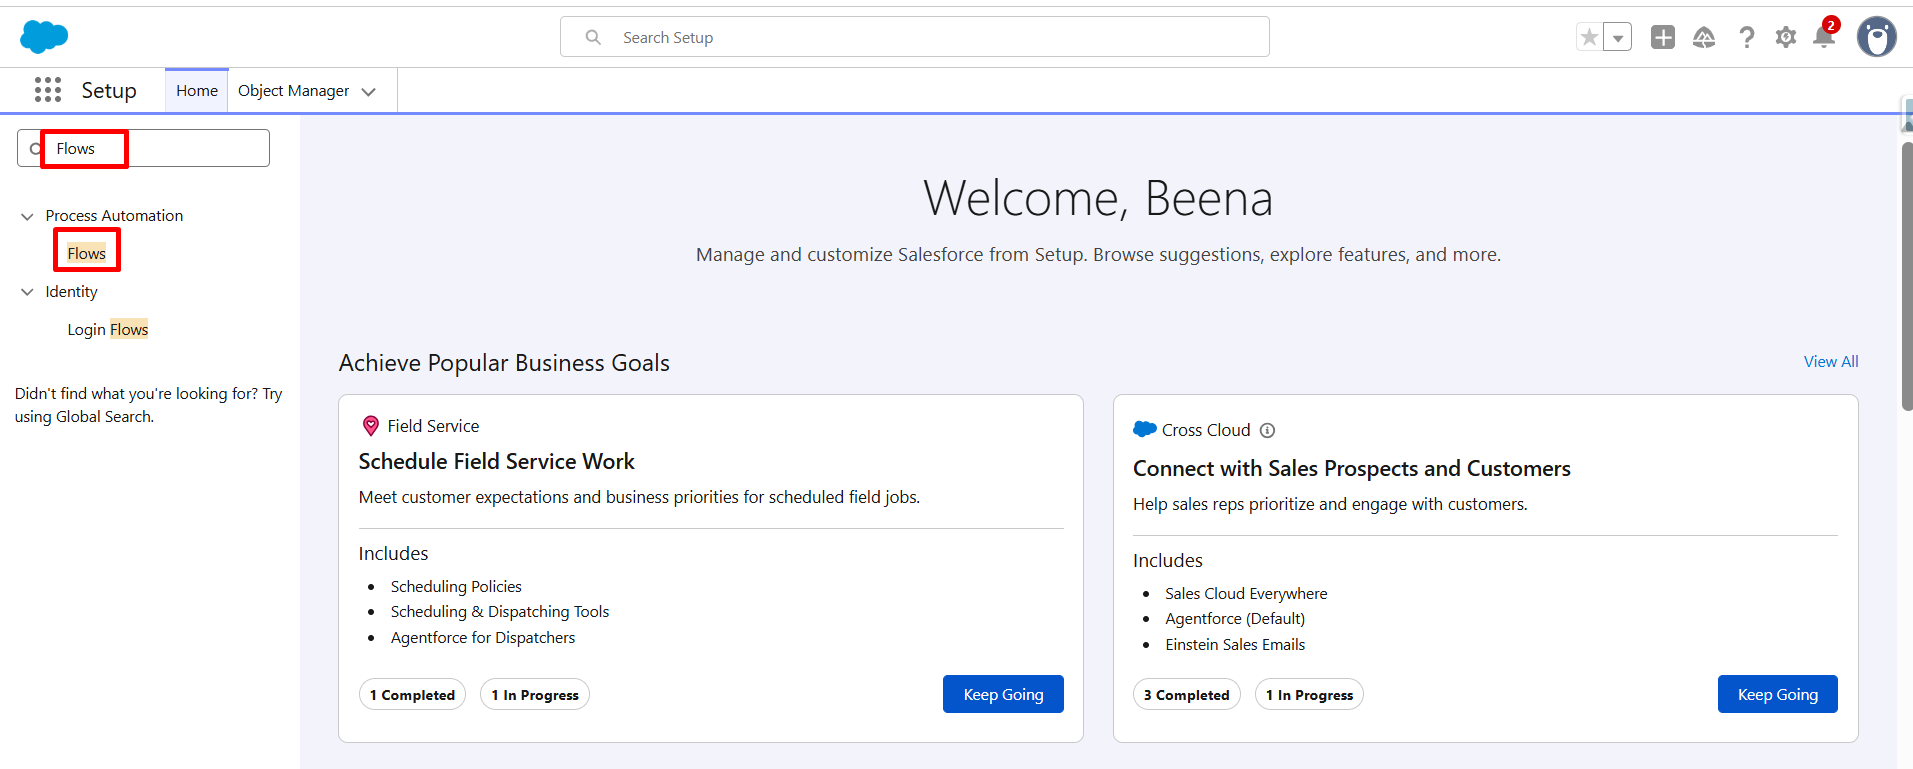
- In the Quick Find box, search for Flows.
- Click Flows.
Step 2: Open the Create Flow Template
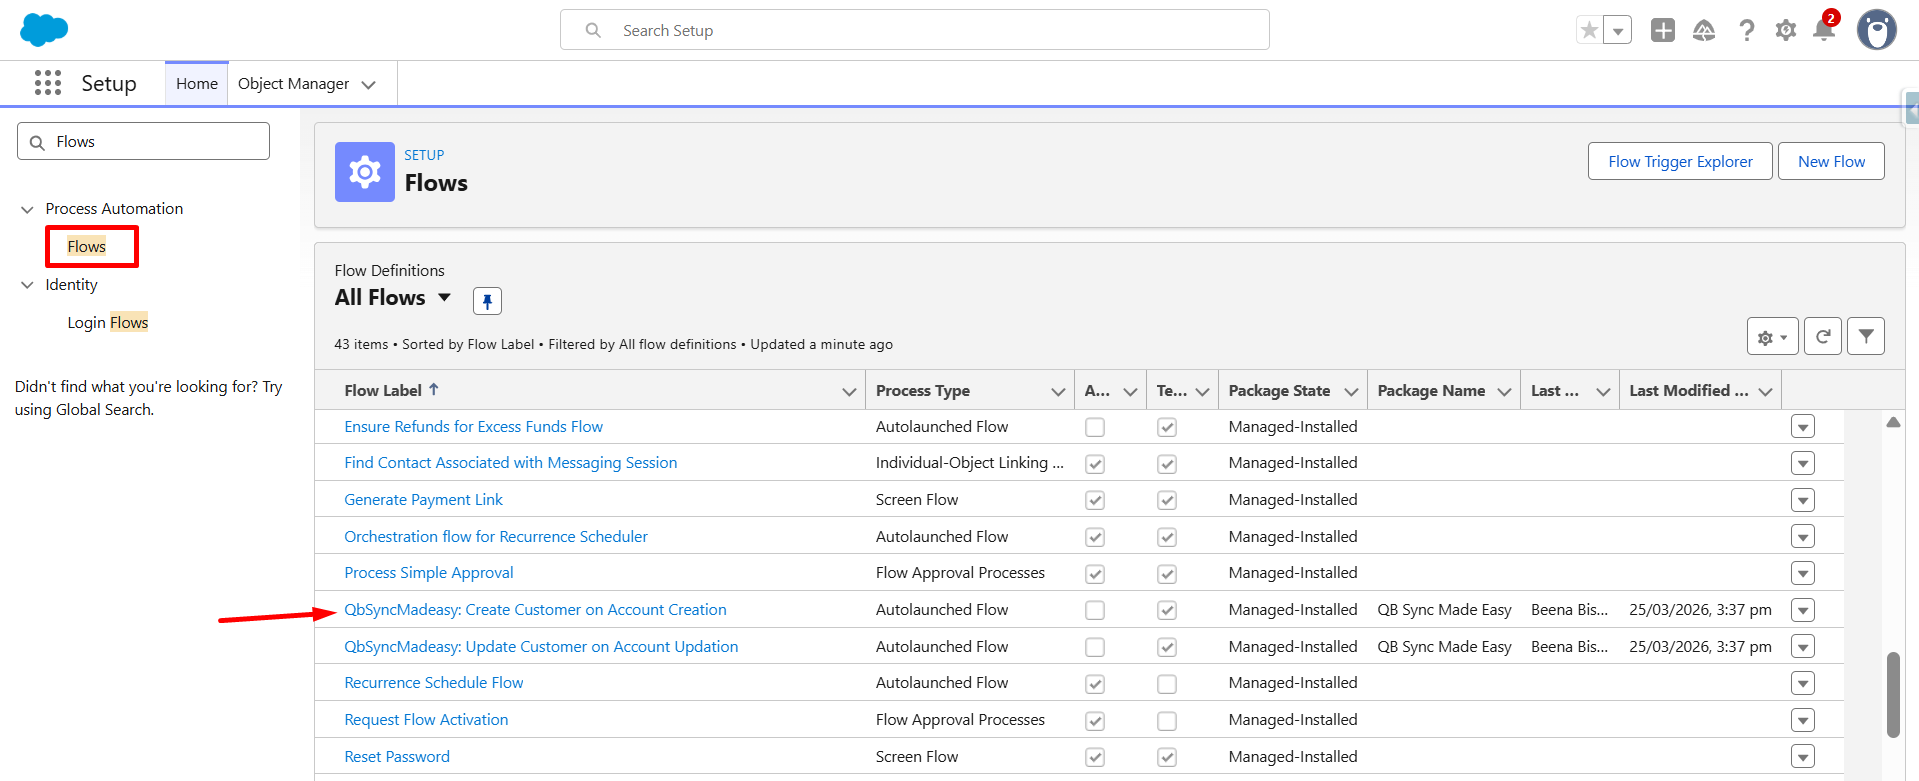
- Locate the QB Sync Made Easy Create Flow Template.
- Select the Create Flow Template.
- Open the template to configure the synchronization process.
Step 3: Configure the Flow Trigger
- Open the Start element of the flow.
- Select the Salesforce object you want to synchronize.
- Set the trigger to A record is created.
For example:
- Salesforce Object: Account
- Trigger: A record is created
This configuration starts the flow whenever a new Salesforce Account is created.
Step 4: Configure the Choose QB Record Flow Action
- Locate the Choose QB Record flow action.
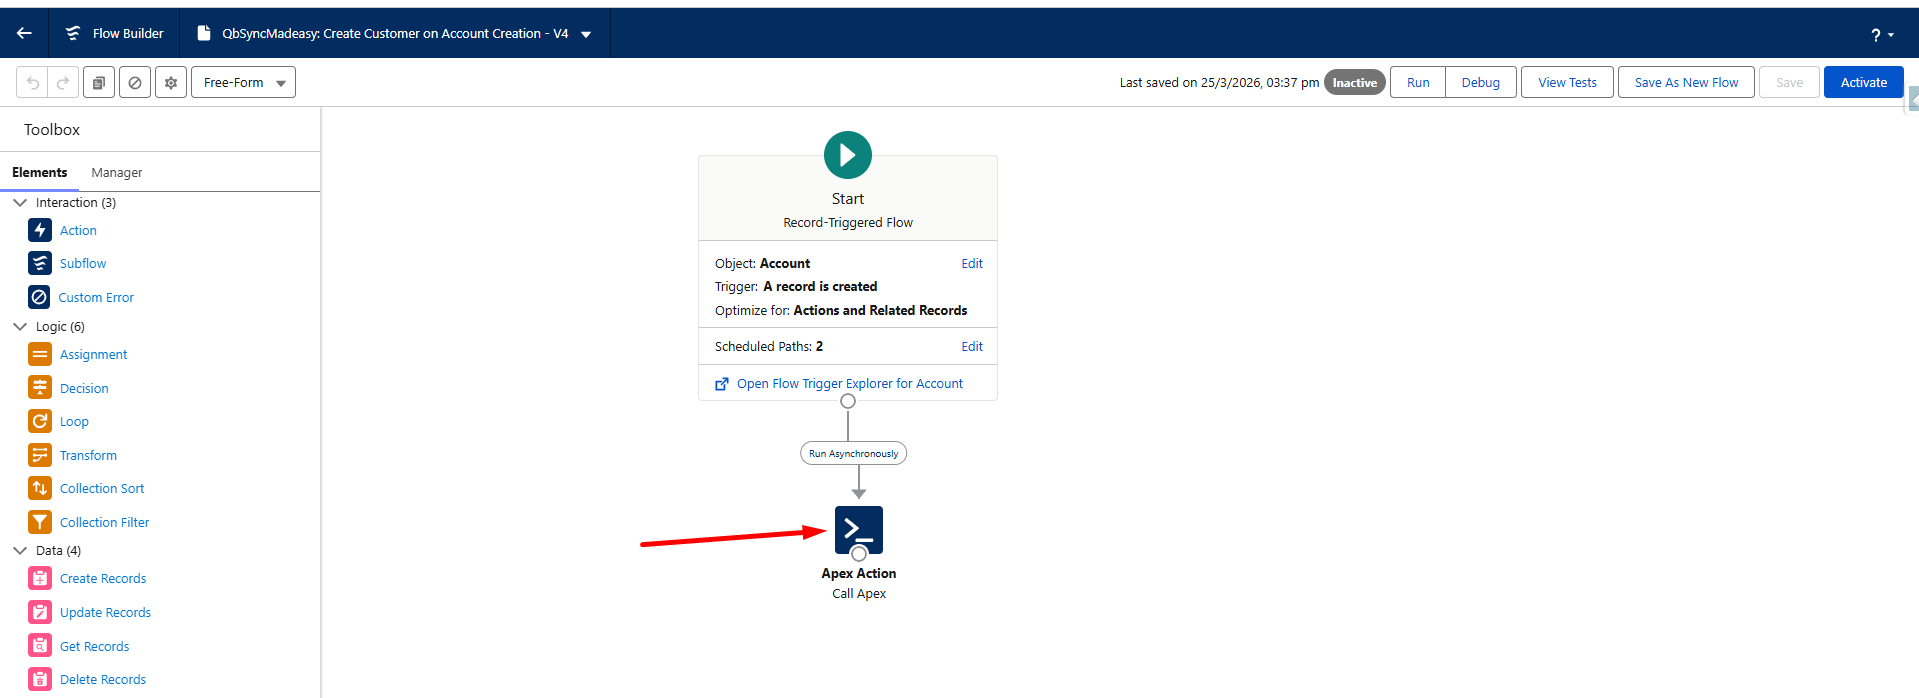
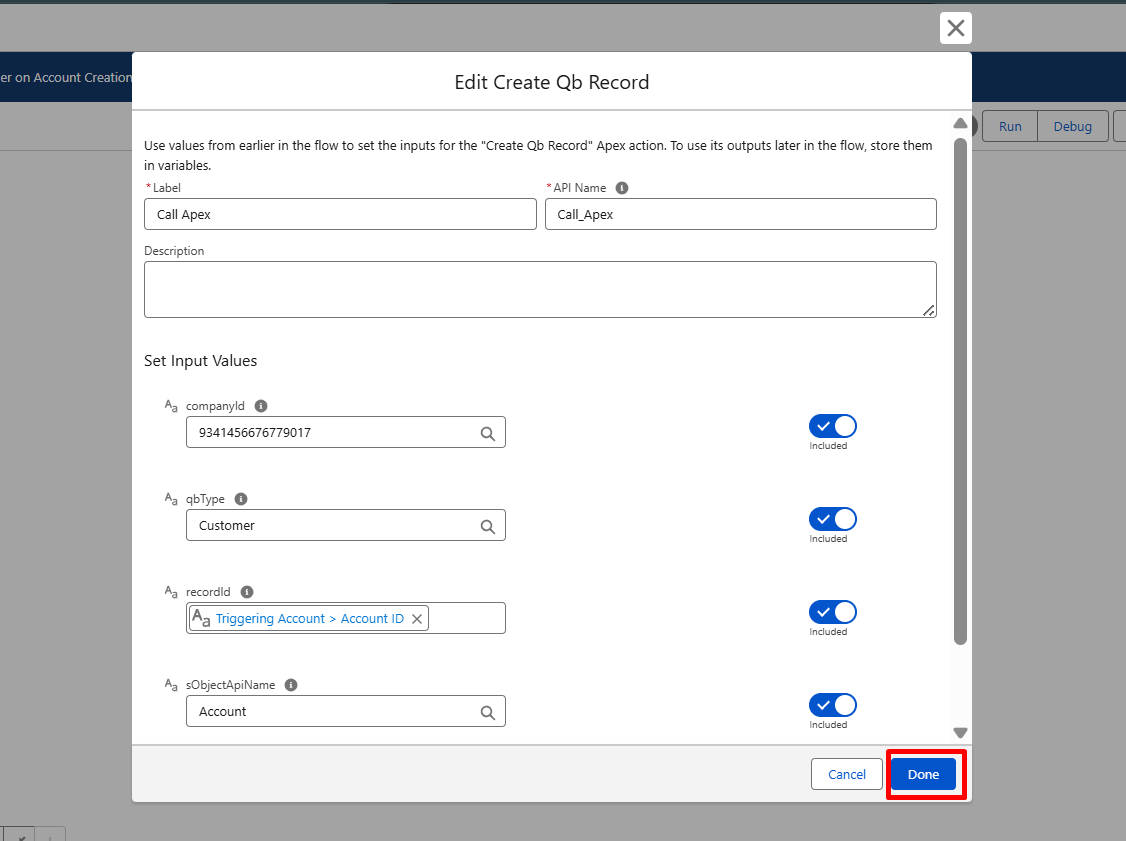
- Configure the following four values.
- Company ID
- Enter the QuickBooks Company ID of the connected company where the record should be created.
- Example: 123456789012345
- QB Object API Name
- Enter the API name of the QuickBooks object that should receive the Salesforce record.
- Example: Customer
- Triggering Point
- Select the triggering point for the synchronization.
- Set it to Created to initiate synchronization when the Salesforce record is created.
- Salesforce Object API Name
- Enter the API name of the Salesforce object used in the flow.
- Example: Account
Step 5: Save and Activate the Flow
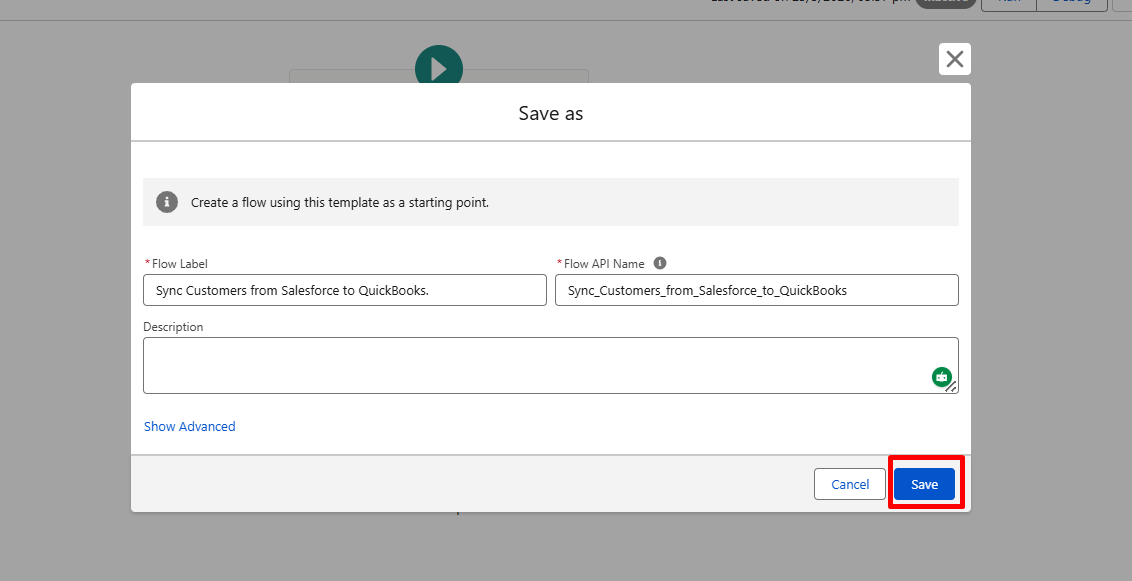
- Click Save As New Flow.
- Enter the required Flow Label Name.
- Save the flow.
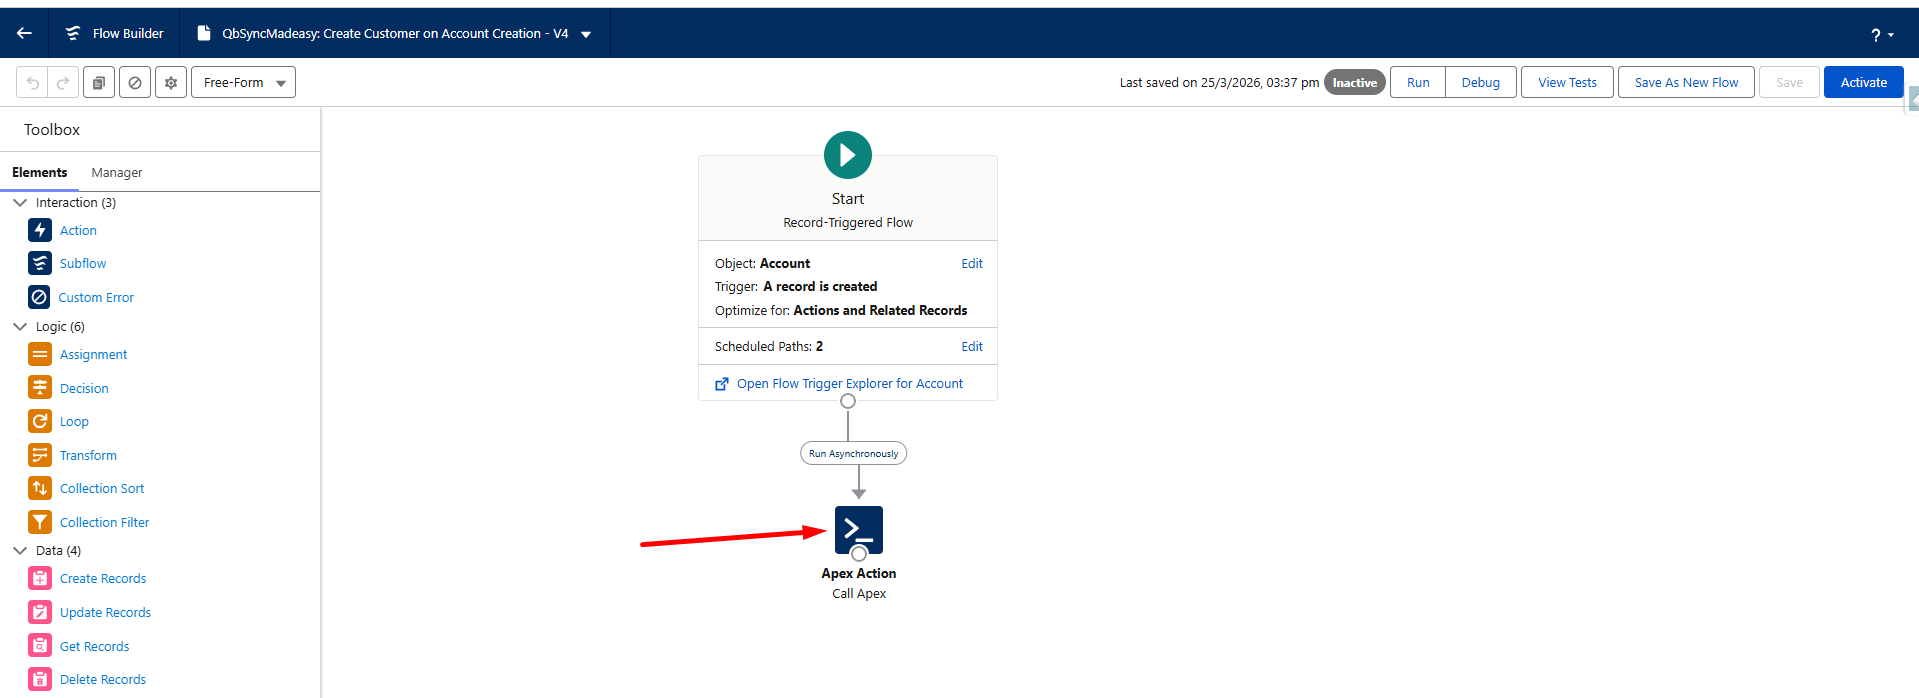
- Click Activate to enable the flow.
What Happens After You Activate the Flow?
Once the flow is active, the configured process automatically handles new records:
- A new Salesforce Account is created.
- The Create Flow is triggered.
- The Choose QB Record action identifies the configured QuickBooks company and object.
- The record is processed for synchronization.
- The corresponding QuickBooks Customer is created based on the configured field mapping.
Example workflow:
Salesforce Account Created → Create Flow Triggered → Choose QB Record → QuickBooks Customer Created
Conclusion
Automating record creation helps businesses simplify QuickBooks and Salesforce workflows while reducing repetitive data entry. With QB Sync Made Easy, businesses can use Salesforce automation to support their QuickBooks Salesforce Integration and keep records consistent across both platforms.
Once the automation is configured and activated, your team can spend less time creating records manually. If you need further assistance with setup or configuration, contact us at Support@qbsyncmadeasy.com.