How to Use Manual Matching to Keep Your Salesforce–QuickBooks Integration Duplicate-Free

Published on November 20, 2025
Updated on January 19, 2026
By Team QB Sync Made Easy
To overcome the challenges of manual Salesforce QuickBooks integration, users often implement automated solutions such as QB Sync Made Easy to replace error-prone manual or basic connector methods. While these apps offer automation, previous manual data entry can lead to complications, primarily the failure to populate essential external IDs from QuickBooks into Salesforce.
The absence of these external IDs causes issues with features like the Legacy Data Sync in QB Sync Made Easy. Without the correct identifiers, the application cannot match existing records, resulting in duplicate entries upon import. Here are the quick steps to avoid any duplication using QB Sync Made Easy, the manual matching function.
The Solution: Smart & Manual Matching
With QB Sync Made Easy, you don’t have to worry about mismatched or duplicate records during sync. The system first matches Salesforce and QuickBooks data automatically using your field mapping rules.
For example:
If a QuickBooks customer’s Display Name equals the Salesforce Account Name, the system will update the existing Account instead of creating a new one.
However, sometimes QuickBooks and Salesforce records don’t share the same names or consistent identifiers. In such cases, automatic rules can’t always find perfect matches.
That’s where the Manual Matching feature comes in – giving you full control to decide how each record should be linked.
Using Manual Matching, you can:
- Match any QuickBooks record to an existing Salesforce record of your choice
- Create a new Salesforce record if no suitable match exists
This ensures your Salesforce QuickBooks integration remains clean, consistent, and duplicate-free.
Manual Matching in QB Sync Made Easy
The Manual Matching feature lets you manually connect QuickBooks records with Salesforce records – or create new ones directly – before syncing.
Before You Start:
Before using the Manual Matching feature, make sure you’ve already installed QB Sync Made Easy in Salesforce.
Here is the link for setting up the company and doing mapping – https://qbsyncmadeasy.com/blog/qb-sync-made-easy-how-to-connect-and-configure/
Make sure the following are set up:
- Your Salesforce and QuickBooks companies are connected
- Field mapping is completed for QuickBooks → Salesforce.
Steps to Use the Manual Matching Feature
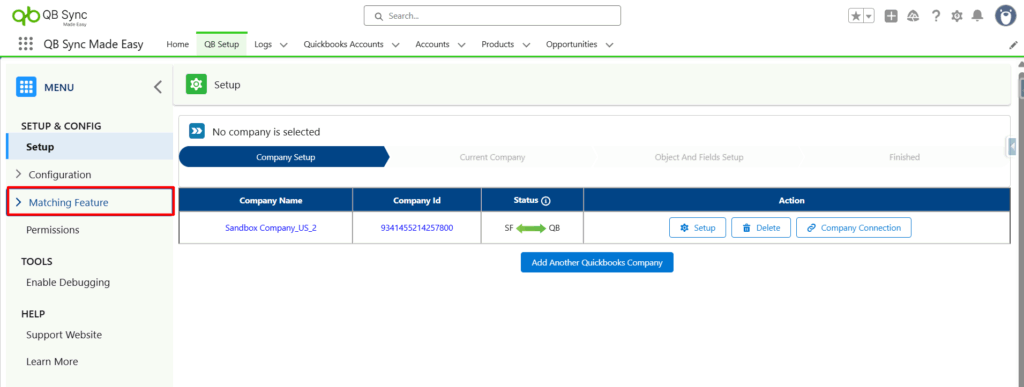
Step 1. Open the QB Setup Page and click on “Matching Feature” on the left sidebar.
Step 2. Click on the Matching Feature and select Manual Matching.
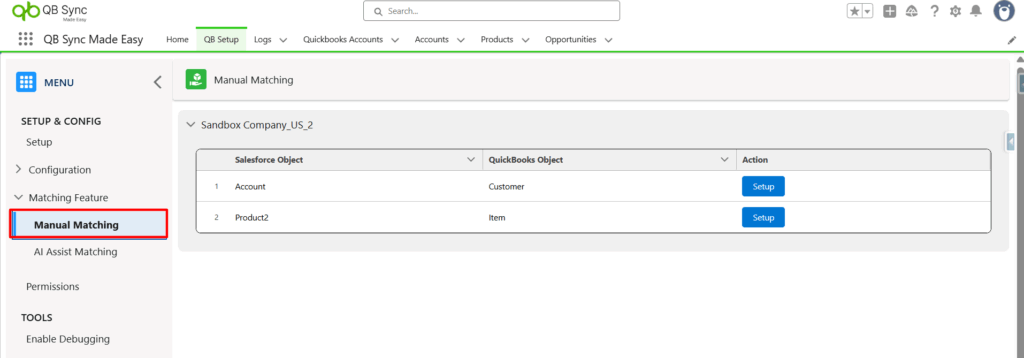
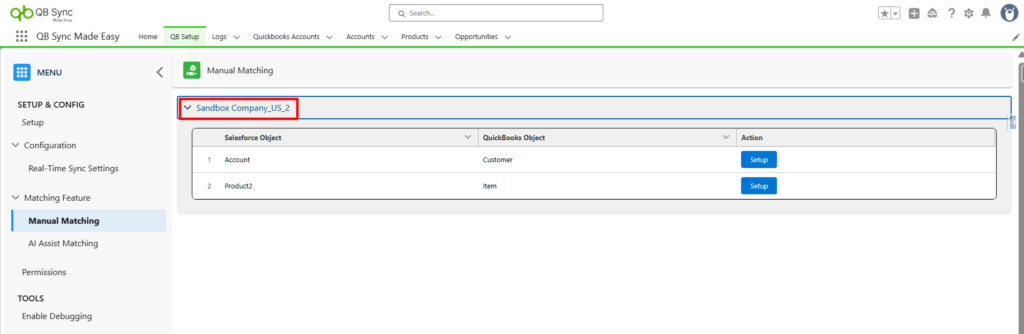
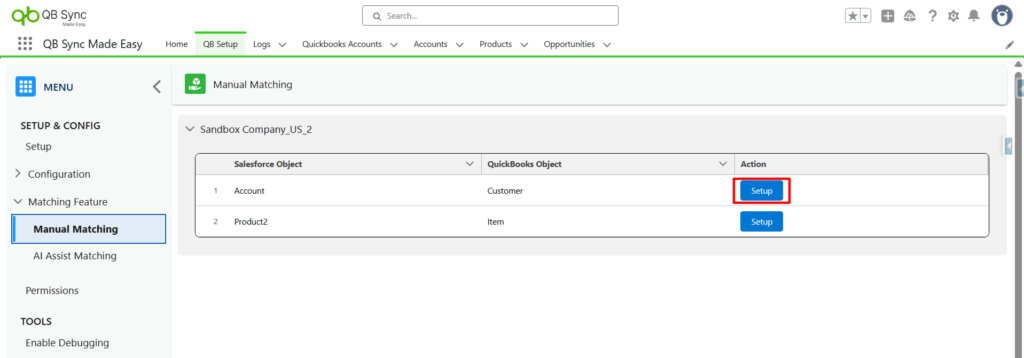
Step 3. Connected Company and Its Objects
Here, you can view the company name and all mapped Salesforce and QuickBooks objects.
Step 4. Click Setup, next to the object you want to manually match.
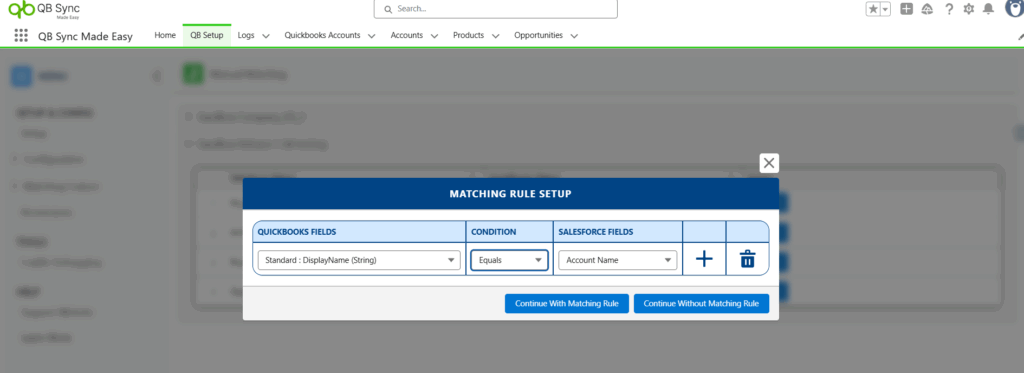
Step 5: You can define a matching rule here.
This rule will suggest the corresponding Salesforce record for a QuickBooks customer. Don’t worry – no records will be updated in Salesforce. You can also click the “Continue without Matching Rule” button to proceed without setting up a rule.
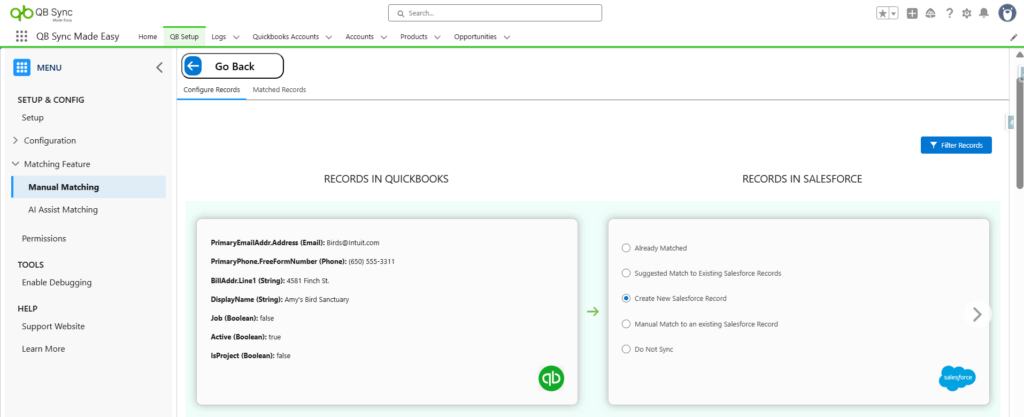
Step 6. View and Match Records
A new screen displays:
- QuickBooks records on one side
- Actions that you can perform for particular QB Records:
- Already Matched – Record is already linked.
- Suggested Match – System has found a possible match based on the matching rule.
- Create New Salesforce Record – Create a new record in Salesforce.
- Manual Match – Manually select a Salesforce record.
- Do Not Sync – Exclude the record from syncing.
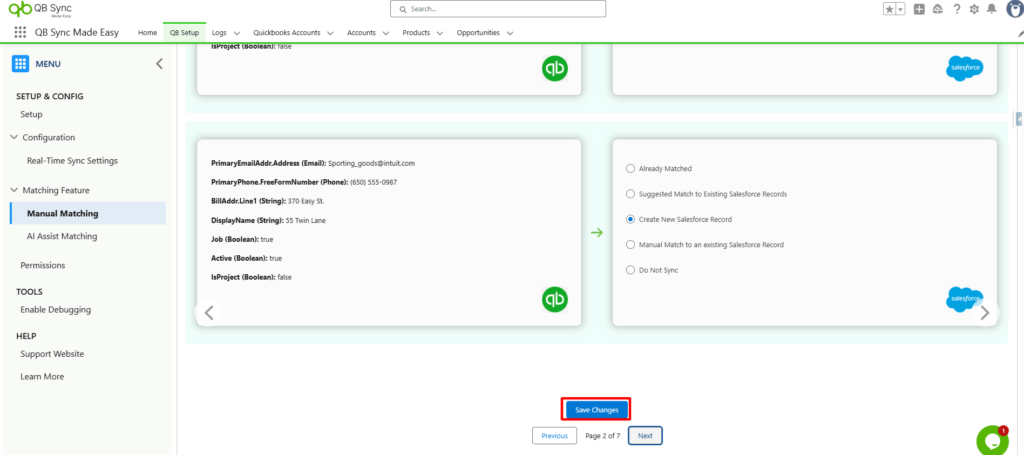
Step 7. Save Your Changes
After reviewing and setting matches, click Save Changes. Your preferences will be saved, and the matched records will be updated accordingly.
Conclusion
The Manual Matching feature in the Salesforce QuickBooks integration solution, QB Sync Made Easy, gives you total control over how Salesforce and QuickBooks records are linked.
Start using Manual Matching today and keep your QuickBooks Salesforce integration organized, reliable, and duplication-free!