Migrating or syncing legacy QuickBooks data to Salesforce doesn’t have to be complex, expensive, or developer-dependent. Many businesses struggle with manual exports, broken imports, and partial data migrations when moving historical financial data between systems.
QB Sync Made Easy offers a free, no-code QuickBooks to Salesforce legacy data sync directly from the Salesforce AppExchange. It allows teams to connect QuickBooks with Salesforce, map objects and fields easily, and import historical data in just a few steps without writing a single line of code.
This guide walks you through the exact process to install, configure, and start syncing your QuickBooks legacy data with Salesforce quickly and securely.
Step 1: Log in to Salesforce
Sign in to your Salesforce account using your correct credentials.
Step 2: Install the QB Sync Made Easy
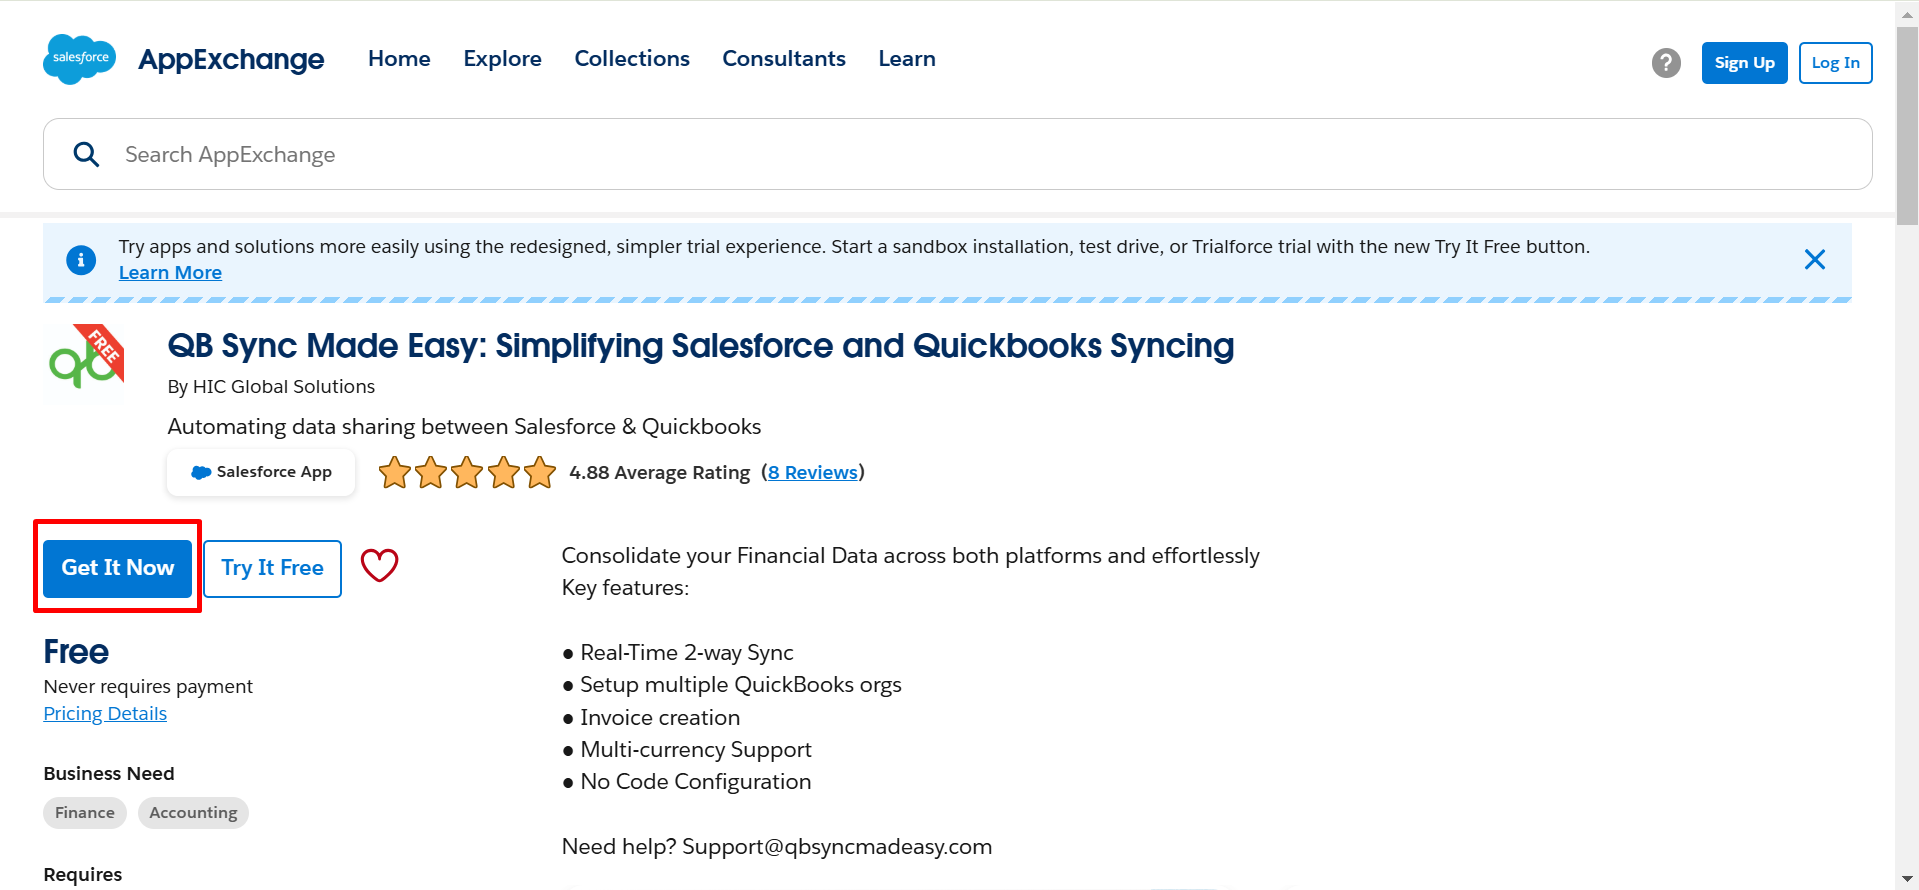
- Go to the Salesforce AppExchange.
- Search for “QB Sync Made Easy.”
- Click Get It Now and follow the prompts to install the package.
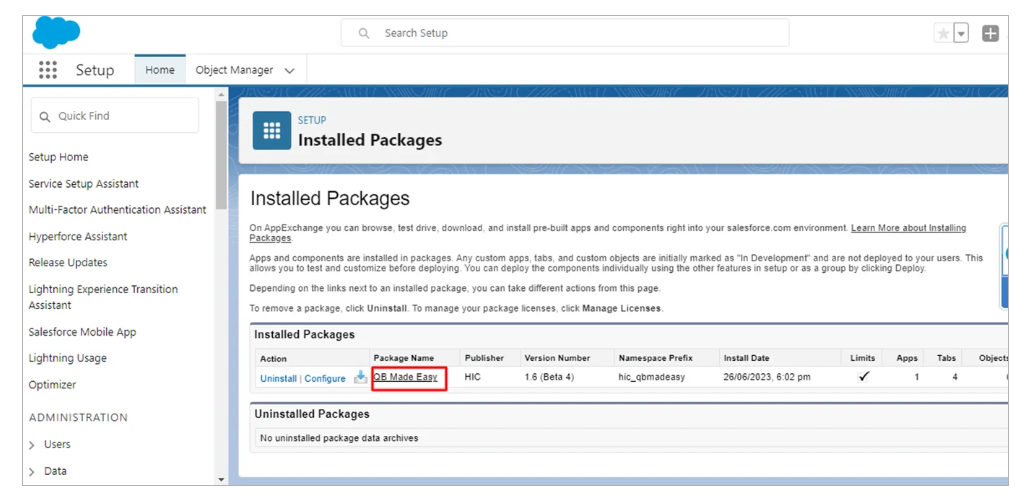
Step 3: Verify Installed Package
After installation, go to Salesforce Setup > Installed Packages to confirm that QB Sync Made Easy is installed.
Step 4: Open the App
- Go to the Salesforce App Launcher/Menu Bar.
- Search for QB Sync Made Easy and open it.
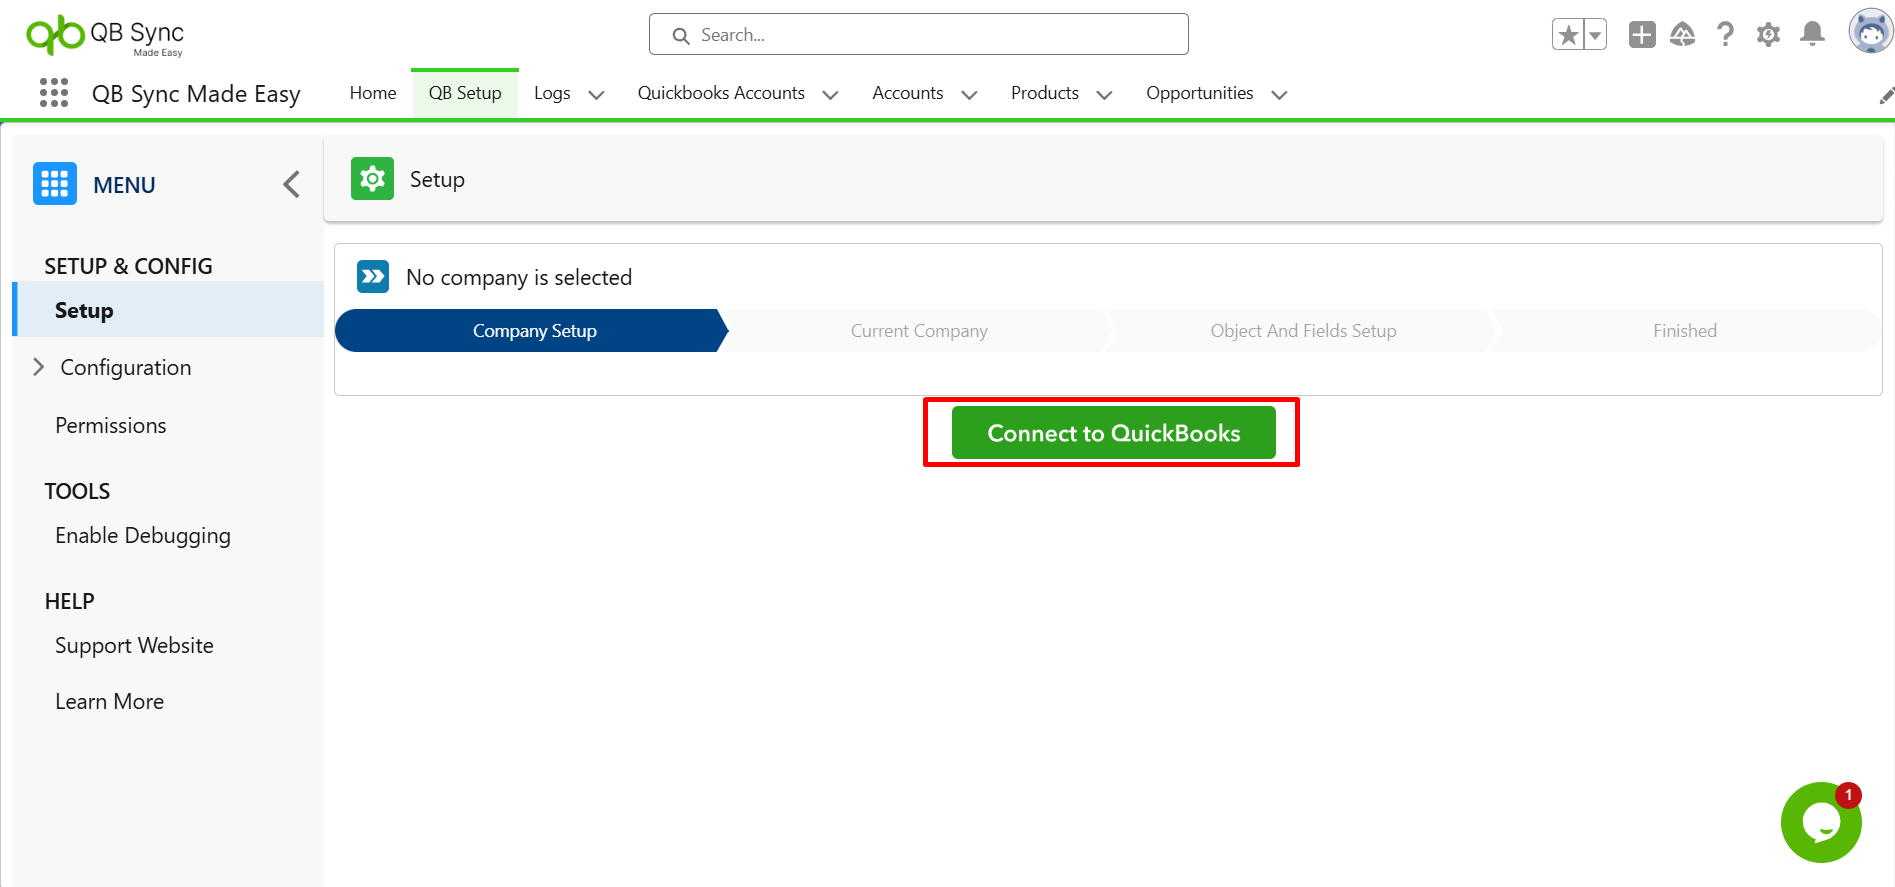
Step 5: Add Your QuickBooks Company
- In the app, go to the Setup page.
- Click Add QuickBooks Company.
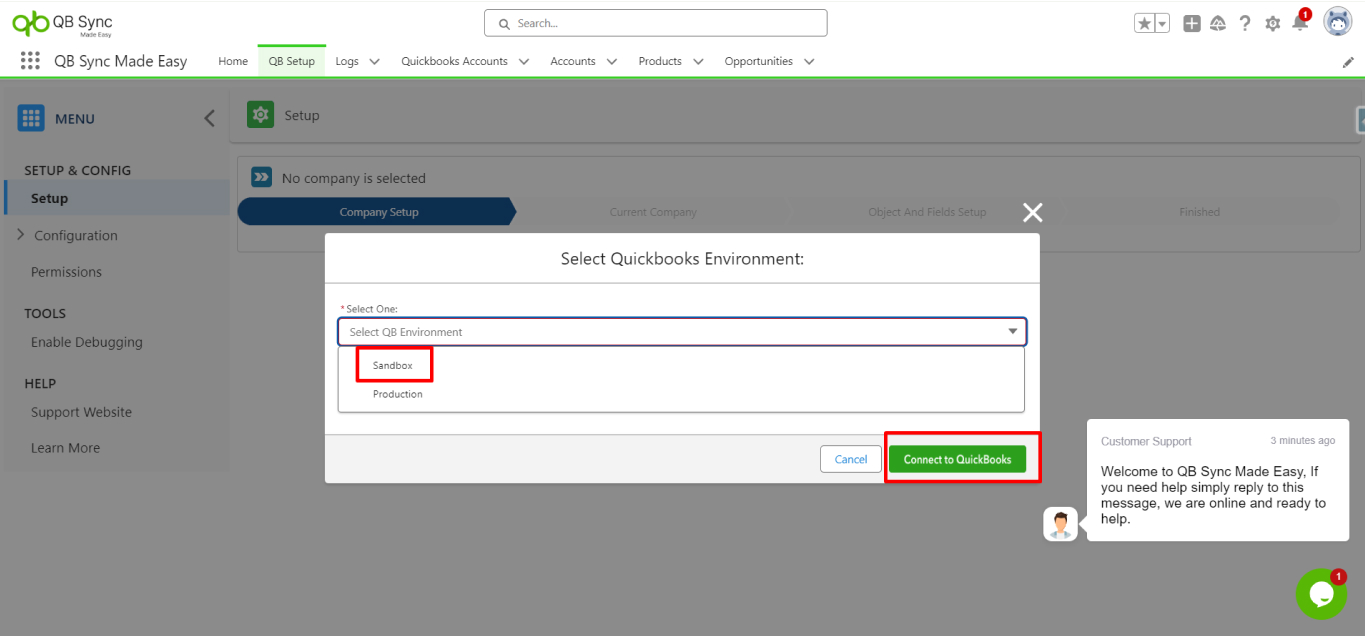
- A pop-up will appear asking you to select Sandbox or Production.
- Choose the environment that fits your requirement and connect your QuickBooks company.
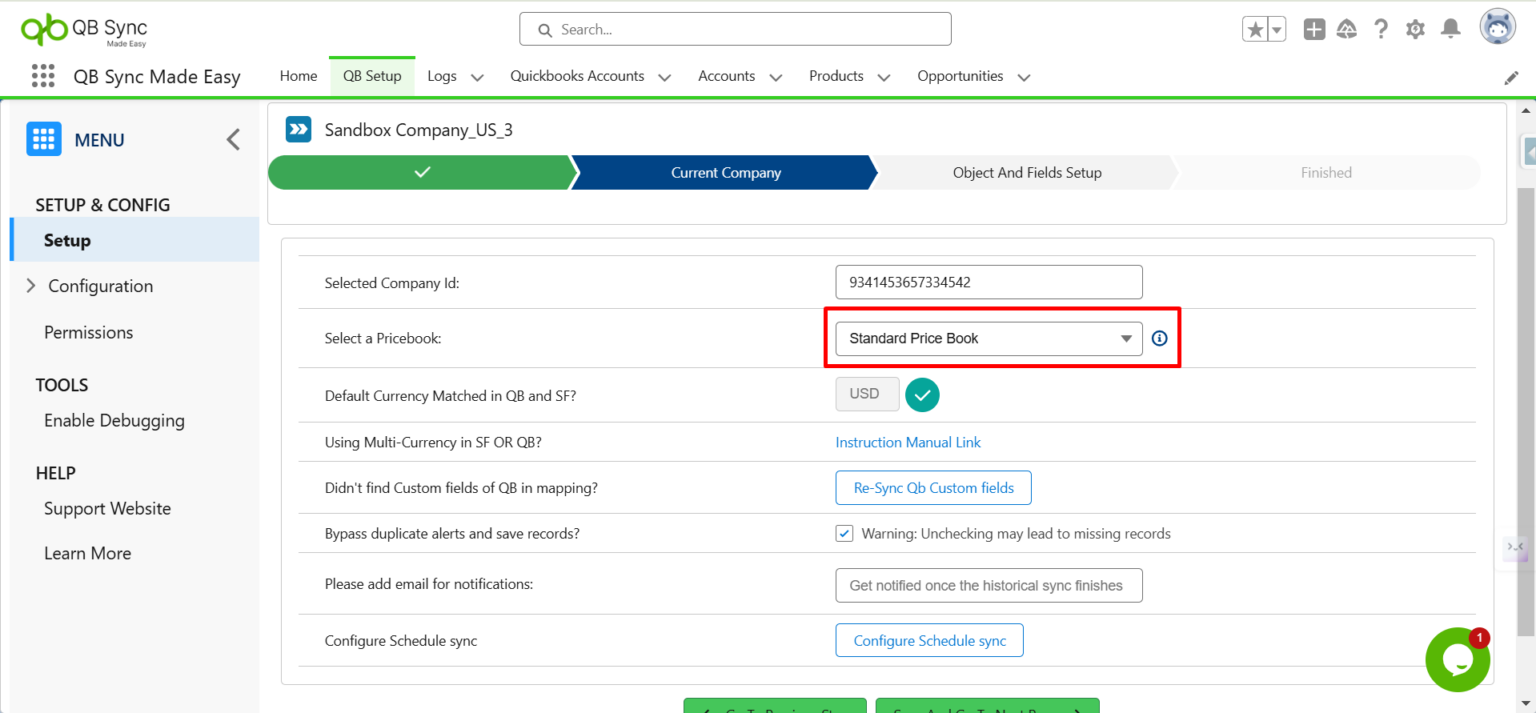
Step 6: Configure Price Book
- Click the gear icon (Setup) to open company settings.
- Select a Price Book.
- Click Save, then click Go to Next Page.
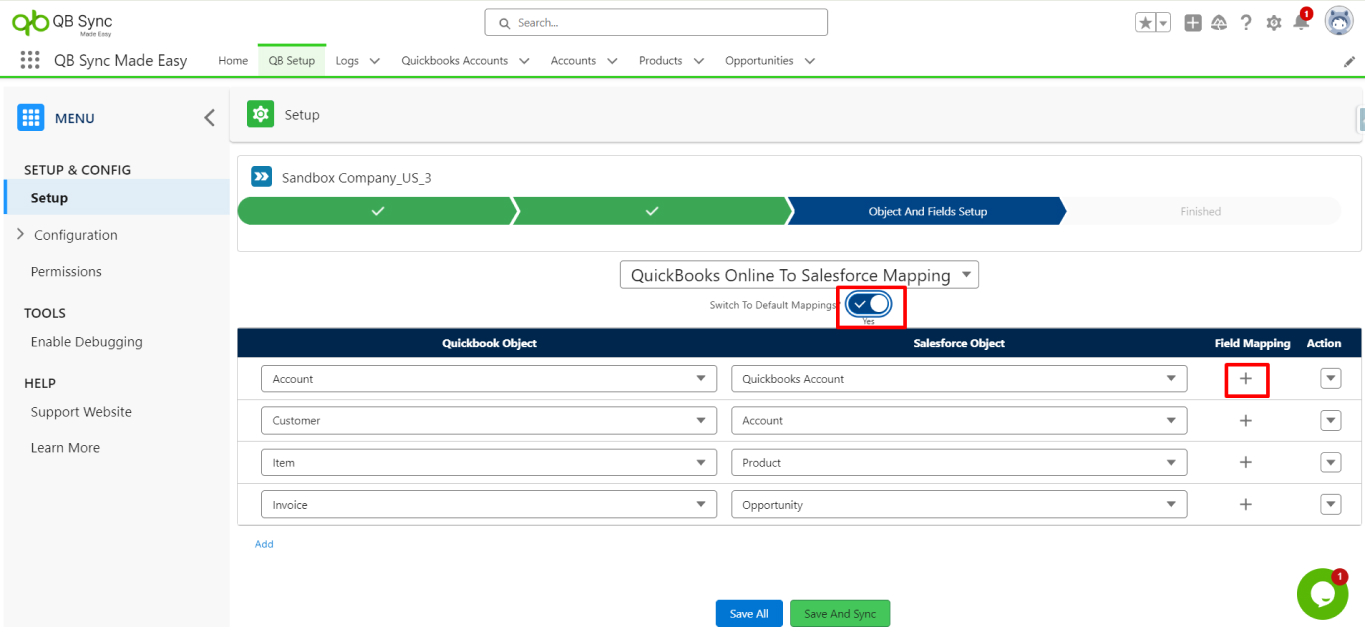
Step 7: Set Up Object & Field Mapping
On the Object and Field Setup page:
- Choose default mapping (QuickBooks → Salesforce or Salesforce → QuickBooks)
or
- Create custom field mappings as needed.
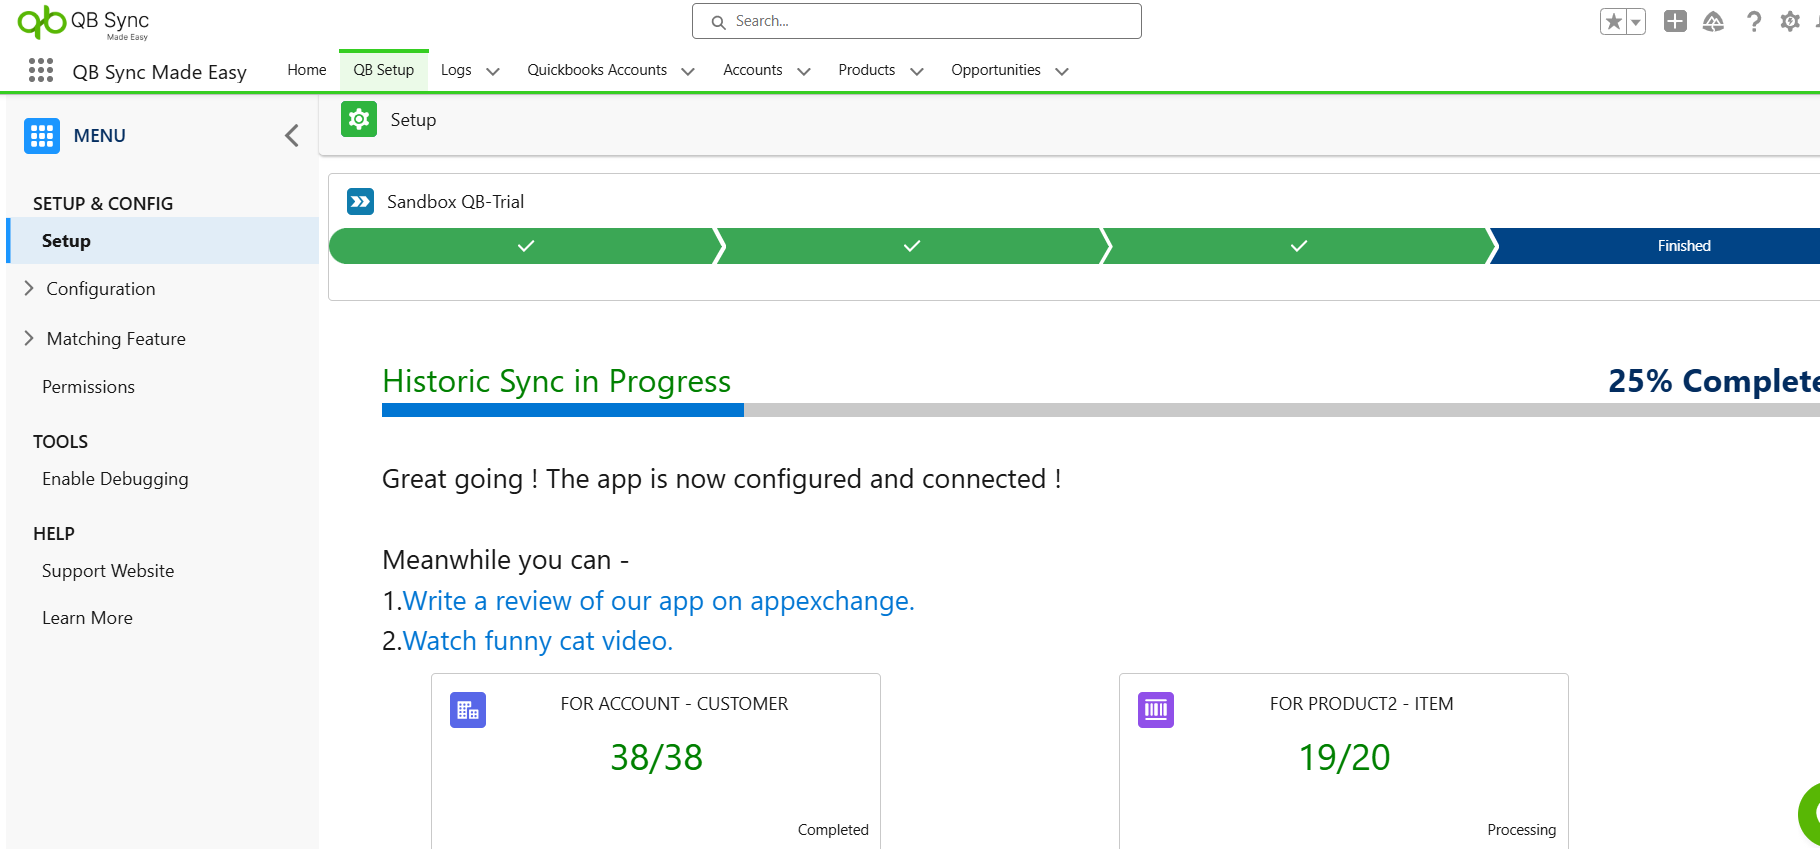
Step 8: Save & Start Historical Sync
- Always click Save All after mapping fields.
- Click Save again to confirm.
The Historical Sync Data process will start automatically.
Why Use QB Sync Made Easy?
- Free on the AppExchange
- No coding required
- QuickBooks to Salesforce Legacy Data Sync in minutes
- Easy field mapping and price book setup
With this setup, your QuickBooks and Salesforce data stay synchronized seamlessly — saving you time and reducing errors.
Conclusion
Syncing legacy QuickBooks data to Salesforce no longer requires complex scripts or third-party development effort. With QB Sync Made Easy, businesses can complete a free, no-code QuickBooks to Salesforce data sync while maintaining accuracy, consistency, and full control over their data.
By following the steps outlined above, you can install the app, configure mappings, and start historical data sync within minutes. This approach reduces manual errors, eliminates repetitive data handling, and ensures your Salesforce and QuickBooks systems stay aligned.
If you’re looking for a simple and scalable way to migrate or sync QuickBooks legacy data with Salesforce, QB Sync Made Easy provides a reliable foundation to get started; quickly, securely, and without technical complexity.